Integrated Documents Processing
Integrated document processing, or heterogeneous document processing, involves handling a unified set of documents that consist of various types of documents. These could include items such as Aadhar cards, PAN cards, medical forms, and more. TruCap+ offers a specialized feature for processing integrated documents, allowing for inter-document validation rules across fields from different subtypes. This functionality treats such documents as a single case during processing, streamlining the workflow.
Overview of integrated document processing
When an integrated document is uploaded, TruCap+ applies document splitting and classification to segregate pages according to subtypes. Each page is processed individually within its subtype. Once all individual pages have been processed, the integrated rules are employed to verify data extraction, validation, and inter-document validation failures. This approach ensures accurate and reliable processing, even when dealing with complex integrated documents. See example
Note:
It's recommended to upload documents containing only one integrated documents case. For instance, a PDF document with multiple pages of a single person's claim form. Uploading documents with multiple user records within a single file may lead to confusion and errors.
Processing integrated documents
To process integrated documents, follow these steps:
-
Set the project as an integrated project to enable inter-document validations.
-
Define the project's input and output types for integrated documents.
-
Apply validation rules across fields from different subtypes.
Introducing integrated project option
A toggle button named Integrated Project is introduced to enable inter-document validations for integrated documents. Refer Parameters tab in Adding project for more details.
Input and output type for integrated project
Input type
Note:
While defining an input source for an integrated project, the subtype field is disabled. Refer to Adding input source for setting an input source.
Below is the list of different scenarios in which the user can ingest the different type of documents in case of integrated documents.
-
Individual file: If the ingested file is a single document, then each document is considered as a integrated (heterogeneous) case.
-
ZIP file: If the ingested file is a ZIP file, all files within the ZIP file and its sub-folders will be considered a single integrated (heterogeneous) case for maintaining a single level of parent-child relation.
-
Email: All documents attached within an email, whether zipped or not, will be treated as a part of a single integrated (heterogeneous) case, and the email will be treated as a parent document for integrated projects.
-
Multiple heterogeneous documents inside a single file: In case of multiple integrated documents received in a single file, the user should send the parent document to split merge and discard the unwanted pages.
-
Enormous files in a folder: Suppose the number of child documents after auto/manual classification and splitting within a single heterogeneous case is more than 50. In that case, the parent document is rejected with the appropriate remark mentioned in the Document monitor. For example, If rejected due to >50 count, the remark would be File count exceeded for Integrated Project.
-
API: If the input type is an API, the user is expected to push the single document \ zip file for integrated project without selecting a specific subtype as a single heterogeneous case. API users should be able to fetch status, data, and invoice HITL for MI \ QC based on Parent document ID.
Output type
Note:
-
While defining an output source for an integrated project, the Merge output for Doc Classification toggle switch is enabled by default. Refer to Adding output source for setting an output source.
-
For an integrated project, merging of output is mandatory. Hence the output will be a single file depending on the output file format selected.
Setting minimum and maximum document count
If the project is an integrated project, then, at the subtype level (only for the integrated project), the user can set the minimum and the maximum document count under Integrated Project Document Count field (see below image). For details about adding subtype, refer adding subtype.
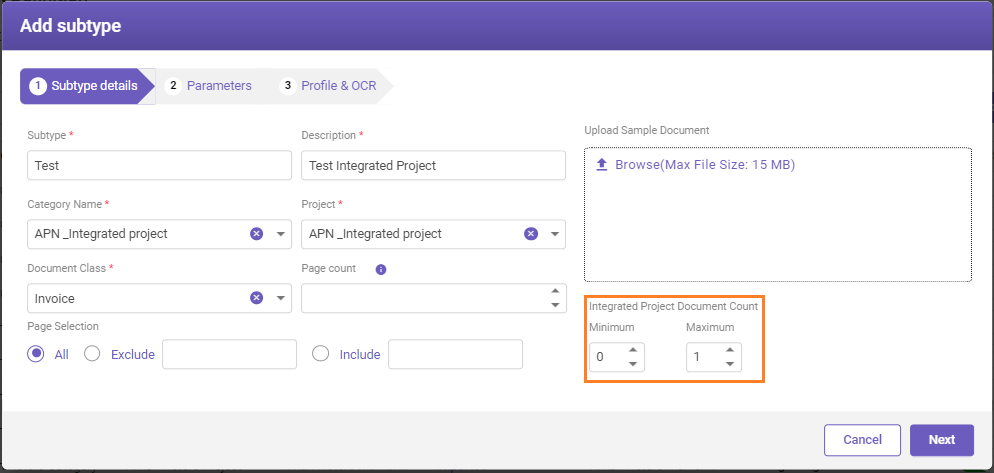
By default, the minimum count will be 0, and the maximum count will be 1 [the permitted range is between (0-100) both for Min and Max values, respectively]. The user can change as per requirement. The Min and Max value could be set the same. For example, Min and Max are 2; in this scenario, we expect exactly 2 documents from that subtype.
Setting integrated rules
If the Integrated Project toggle button is enabled, then the user can set rules (2 rules mentioned below) where the user can set validation rules across fields from different subtypes.
Note:
-
In TruCap+, '@' is used to specify the field. For inter-validation, '$' will be used to include the sibling subtype. For example, $PAN@PANname, where PAN is the subtype and PANname is the field on the PAN subtype.
-
Introduction of the 2 new rules will not affect the existing rules.
-
The 2 new rules are only applicable to the Header section.
Below are the 2 validation rules to set validation rules across fields from different subtypes.
Match percentage for tab name
Description: The "Match Percentage for Tab Name" validation rule allows you to validate data by checking for partial matches between extracted data from different documents. This rule is useful when you want to ensure consistency in related information across multiple documents.
Rule details
Ontology screen name: Compare with reference field for percentage match with constraint else perform action on fail
Programmatic name: InterdocumentValidationForPartialMatch
|
PARAMETER NAME |
PARAMETER TYPE |
PARAMETER DESCRIPTION |
|---|---|---|
|
Reference Field |
Reference |
A reference field from which the value is to be extracted. Note: From the Dependent Subtype and Dependent Field drop-down list, select the required expression to be evaluated and click on the |
|
Percentage |
Selection List |
Indicates the match percentage. Permitted value-range is 5 % to 100%. |
|
Constraint |
Selection List |
Indicates any kind of restriction to be set while fetching the data. Available options are Strictly One, All, Any One, All if Available, and Anyone if Available. |
|
Action on Fail |
String |
Indicates the action to be taken in case the validation check fails. Available options are Discard, Discard and Continue, and Retain. By default, the Discard and Continue option is selected, change it as per your requirement. |
 icon to add the expression to be evaluated.
Example 1:
Based on the parameter value given below, the data can be compared with the reference field representing a Aadhar.
|
PARAMETER NAME |
PARAMETER VALUE |
|---|---|
|
Reference Field |
$Aadhar@AadharName |
|
Percentage |
80 |
|
Constraint |
All |
|
Action on Fail |
Discard |
Multiple values against a field
Example 2:
If the Claim document has 2 child PAN cards or 2 child Aadhaar cards, there would be multiple values received against a PAN Name and Aadhaar Name and to handle this, the user can use the rule as given below.
|
PARAMETER NAME |
PARAMETER VALUE |
|---|---|
|
Reference Field |
$Claim@name |
|
Percentage |
80 |
|
Constraint |
Based on the option selected the rule will work accordingly. Strictly One: Only one Claim name reference is to be found. If more than one Claim value is found, the validation will fail. Please note that this is also applicable for multi-suspect values. All: If 3 reference values are found, all three reference values need to be matched with the match percentage, and only then will the validation pass. Any One: The validation will pass if 3 reference values are found and any of the three reference values meet the match percentage. All if Available / Anyone if Available: In the Claim form, a user may receive a pathology form or not, and the user is unsure; in that case, the user will apply the Anyone if available or All if available. |
|
Action on Fail |
Discard |
Note:
-
Use this rule when you want to validate partial matches of data across different documents.
-
The rule allows you to ensure that related information, even if not identical, matches to a certain degree of similarity.
-
Adjust the Matching Percentage Threshold parameter based on your validation requirements.
-
Depending on the result of the partial match validation, you can decide whether to discard, retain, or take other actions on the extracted data using the Action on Fail parameter.
-
Ensure accurate and valid document fields for the reference and comparison documents for correct comparison and validation.
Comparison criteria for tab name
Description: The "Comparison Criteria for tab Name" validation rule allows you to perform validation by comparing data extracted from different documents. This rule is useful when you need to validate the consistency of extracted data across multiple documents.
Rule details
Ontology screen name: Field value to be expression to the reference field with constraint else perform action on fail
Programmatic name: InterdocumentValidationForCompare
|
PARAMETER NAME |
PARAMETER TYPE |
PARAMETER DESCRIPTION |
|---|---|---|
|
Expression |
String |
Expression to be evaluated. Note: From the Expression drop-down list, select the required expression to be evaluated and click on the |
|
Reference Field |
Reference |
A reference field from which the value is to be extracted. Note: From the Dependent Subtype and Dependent Field drop-down list, select the required expression to be evaluated and click on the |
|
Constraint |
Selection List |
Indicates any kind of restriction to be set while fetching the data. Available options are Strictly One, All, Any One, All if Available, and Anyone if Available. |
|
Action on Fail |
String |
Indicates the action to be taken in case the validation check fails. Available options are Discard, Discard and Continue, and Retain. By default, the Discard and Continue option is selected, change it as per your requirement. |
Example
Based on the parameter value given below, the data can be compared with the reference field representing a Aadhar.
|
PARAMETER NAME |
PARAMETER VALUE |
|---|---|
|
Expression |
= |
|
Reference Field |
$Aadhar@AadharName |
|
Constraint |
All |
|
Action on Fail |
Discard |
Note:
-
Use this rule when you need to validate data consistency across different documents.
-
The rule allows you to ensure that the extracted data from one document matches the corresponding data in another document.
-
Depending on the result of the comparison, you can decide whether to discard, retain, or take other actions on the extracted data using the Action on Fail parameter.
-
Make sure to provide accurate and valid document fields for the reference and comparison documents to ensure the correct comparison.
Note:
As a best practice, creating the inter-validation rule in the supporting ontology is advised to be validated against the primary. For example, if a claim form name is to be cross-checked with the name in the PAN of Aadhaar, creating an inter-validation rule under the PAN subtype is advised. Also, it is advised to keep the reference field mandatory.
Setting custom validations for integrated project
Using the Custom tab, user can define rules that can be applied as customised validations for an integrated project. For detailed information about the custom rules, see Expression language syntax topic.
-
When a user clicks on +Add New Rule button to set custom rules for a field in an integrated project. The Custom Rule window opens (see image below).
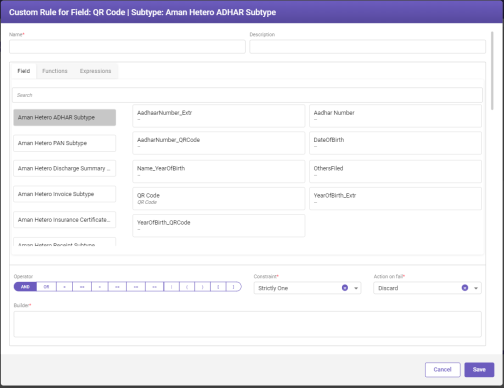
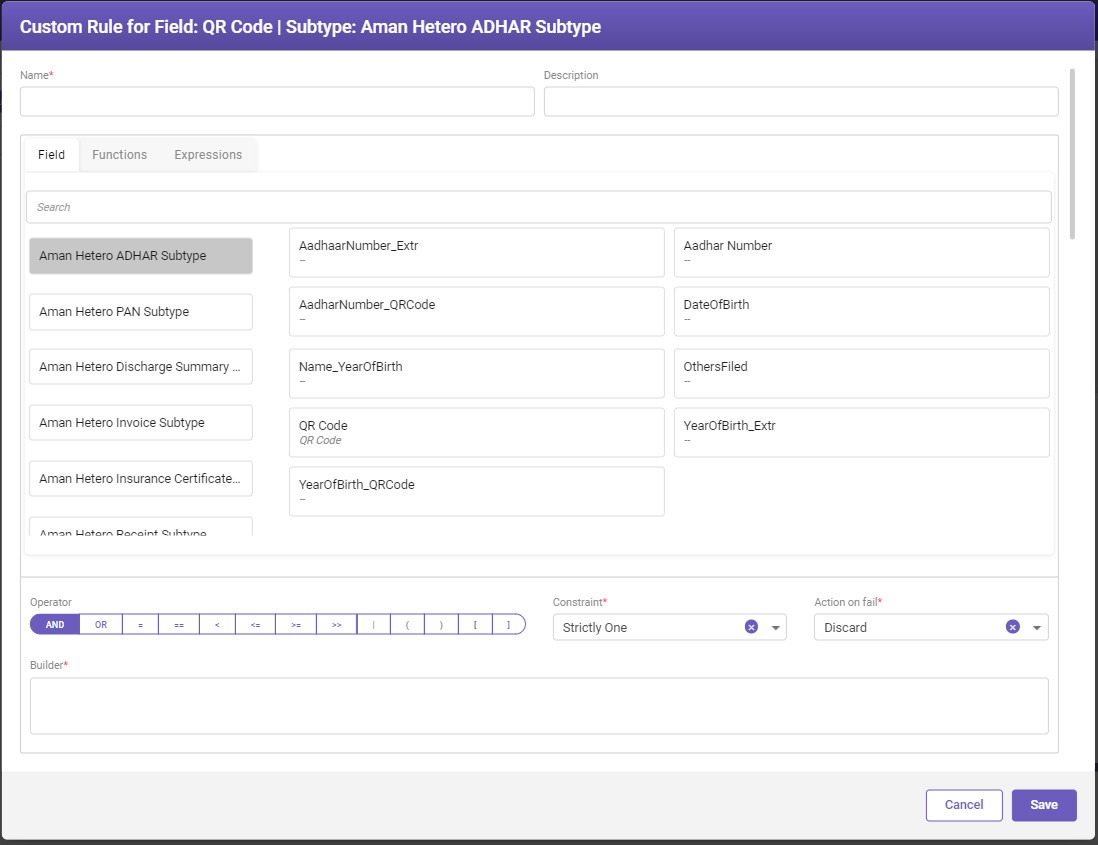
Based on the description given in the table below, provide the required values for the parameters.
|
PARAMETER |
DESCRIPTION |
|---|---|
|
Name* |
Specify a field name. |
|
Description |
Specify a related description. |
|
Field Tab |
Displays the available fields used to create a customized validation rule. All fields, including the sibling subtype fields, are displayed. The left side of the tab shows the integrated project's subtype list and the right side displays the fields created for the selected subtype. Click on the required field in the Field tab for the chosen subtype to include a field. The selected field gets added to the Builder field. |
|
Functions Tab |
Displays the available functions used to create a customized validation rule. Click on the required function available in the Functions tab to include a function (rule). |
|
Expressions Tab |
Displays the available expressions used to create a customized validation rule. Click on the required expression available in the Expressions tab to include an expression in the rule. |
|
Operator |
Displays the operators used to arrange the selected fields, functions, and expressions as per the desired logic. |
|
Constraint* |
Indicates any kind of restriction to be set while fetching the data. Available options are Strictly One, All, Any One, All if Available, and Anyone if Available. |
|
Action on fail* |
Select the required option from the drop-down list to take the action in case the validation check fails. The available options are Discard, Discard and Continue, and Retain. |
|
Binder* |
Displays the selected fields, functions, expressions, and operator. |
|
* Mandatory field |
|
-
Click Save to save the applied custom rules.
Understanding the integrated documents manual handling UI
To access the manual handling page, follow these steps:
-
In the main menu, under Documents Processing, click Manual Process. The Manual Handling page opens.
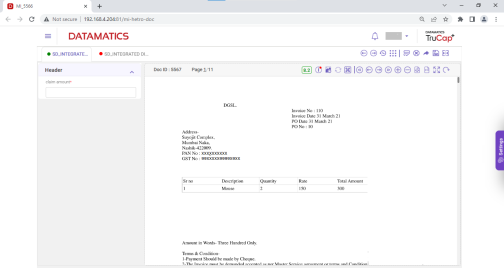
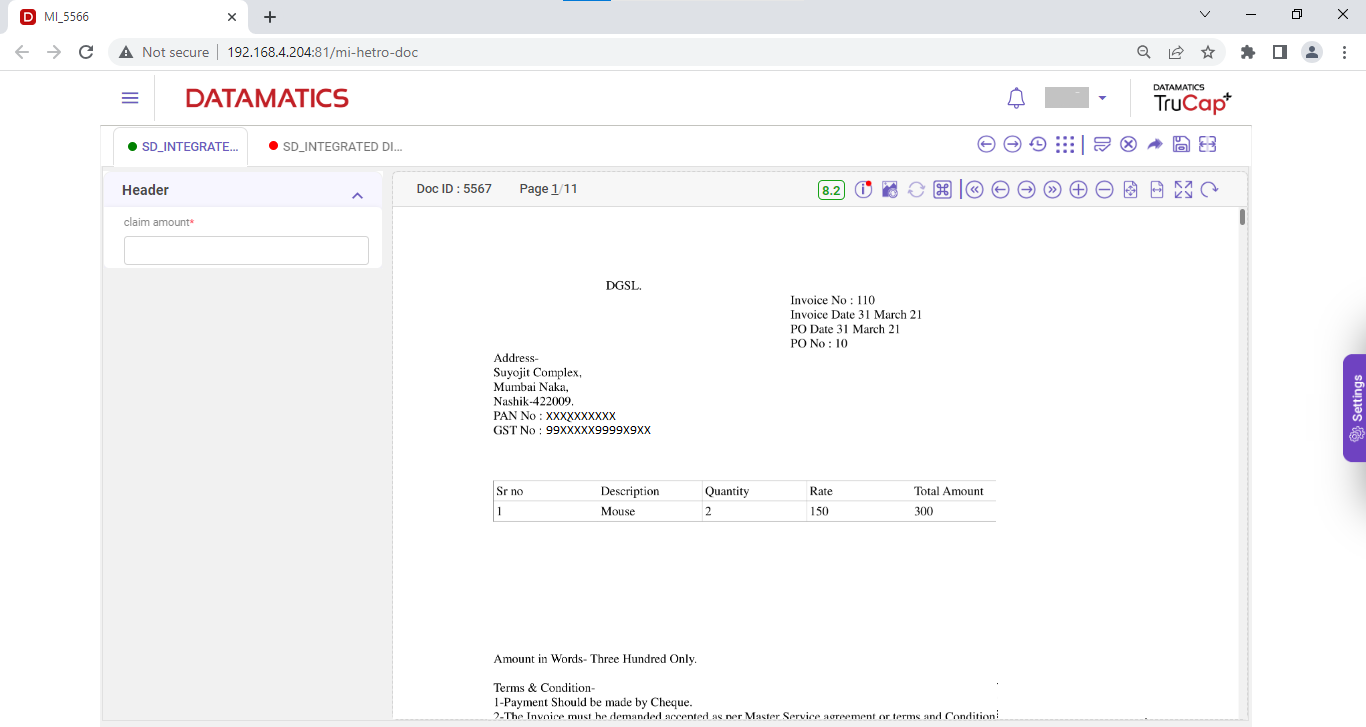
Overview of integrated MI/QC screen
Below is the overview of the integrated MI/QC screen.
-
The integrated MI or QC screen will have tabs based on the document classification.
-
The tabs are named as per the subtype name.
-
The tabs are aligned based on the tab sequence configured at the project level. Refer Parameters tab in Adding project for more details.
-
If the tab name exceeds 12-13 characters, then hover on the tab to view the complete tab name.
-
In the case of multiple tabs, if the number of tabs crosses the MI screen display limit, the rest of the tabs are displayed as a drop-down. Users can scroll through the drop-down and click on the required tab to open it.
-
If the documents have any failed validations or any mandatory fields that have not been filled, then there will be a red dot
 visible as a suffix before the tab name.
-
If the documents have no failed validations or any mandatory fields, then there will be a green dot
 visible as a suffix before the tab name.
Note:
-
For integrated MI and QC, the View original document toggle switch is disabled. For details about settings, refer to MI page settings.
-
In the case of multi-suspects for a reference field, the field border will change to the multi-suspect color assigned. The user can customize the color of his choice by configuring the settings under the MI field background color section.
Quick access toolbars
The below image explains some handy tools available on the upper-right corner of the Integrated Manual Handling page.
Quick access toolbar 1

Hover-over the above image to know about the available features.
Click on the individual drop-downs for a detailed explanation of the available features.
Page navigation

With the above section of the quick access toolbar, you can use the features available to navigate between the tabs, or go to the recently visited page.
Document grid
Click  the Document Grid window opens.
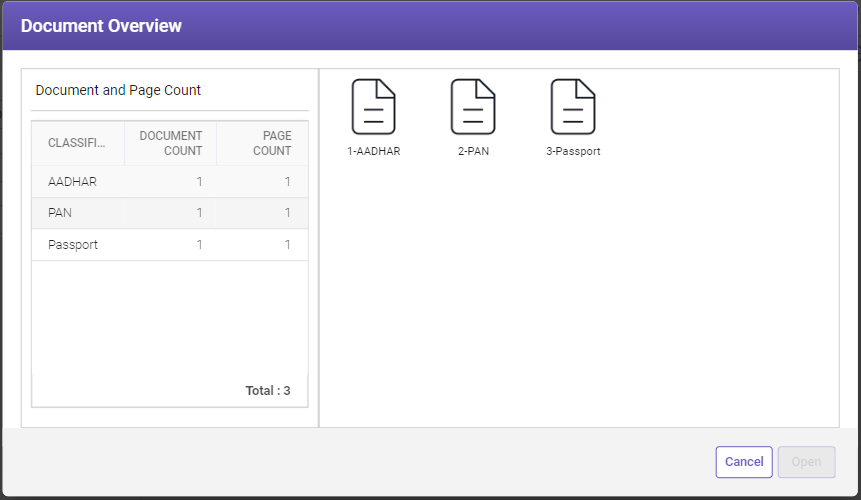
The document grid provides information about the document and page count based on document classification. Select the required document classification page icon and click Open. The selected tab opens.
Partial save
Click the  icon to partially save the changes made in the document on the MI screen. Once you click this icon, a message Document partially saved successfully. is displayed at the top of the MI page.
Reject
You can also reject any document by clicking the Reject  icon, which can be viewed on Operations dashboard under rejected column. When you click the Reject icon, the Reason of Rejection window opens. Specify the reason in the Reason field for rejecting the document and then click Reject.
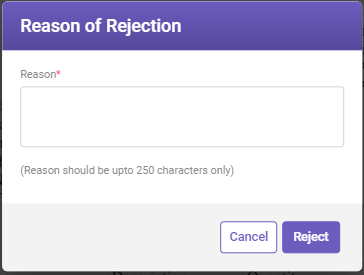
Note:
-
If a user rejects the document, then the complete document, including all child documents is also rejected.
-
If a user is assigned a role that has delete permissions check marked for Manual Process and Quality Check, then that user can reject a document.
-
The reason for rejection specified is displayed in the Document Monitor screen when the current stage is shown as Document discarded.
Forward
To forward the document, perform the following steps.
-
Click the Forward
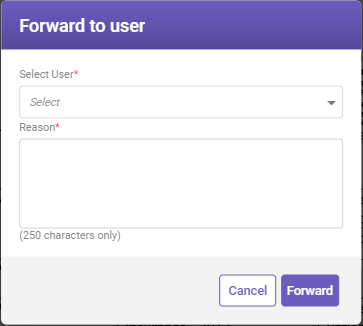
 icon to forward the document. The Forward to user window opens.
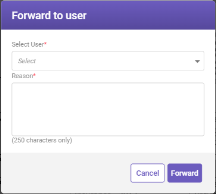
-
Select the user to whom the document is to be forwarded from the Select User drop-down list. Also, specify reason in the Reasonfield, and then click Forward to forward the document to the selected user.
Save
If the documents are accurate, click the Save icon to move the documents to the next stage of exporting.
When you click Save, an option to choose if a particular document has to be moved to quality check with or without executing validations on saved fields is available. If you click Yes, the document gets saved with validation execution i.e. only after all the fields are successfully validated.
If any field validation fails, the Admin User Confirmation pop-up is displayed, prompting to provide input on whether to proceed to save the document with failed validations.
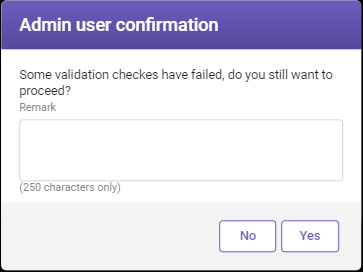
Click Yes to proceed or else click No to close the window.
Send to splitter
Any document that has not been appropriately split and is in the manual process stage, a user can send that document for a manual split.
When you click the Send to splitter icon, the following window opens.
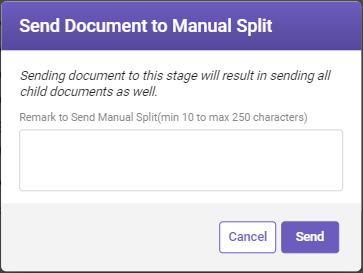
Remark to Send Manual Split: Specify the remarks if required, and then click Send .
Quick access toolbar 2

Hover-over the above image to know about the available features.
Click on the individual drop-downs for a detailed explanation of the available features.
Readability score
Hover over the Readability score  icon to view the readability score
 of the displayed document. The readability score of the same document can also be viewed on Document monitor page under readability score column.
Note: The number displayed on the readability score icon will vary depending on the readability score of the document displayed on the MI screen.
Warning
Hover over the Warning  icon to view document-related information (as shown in below image).
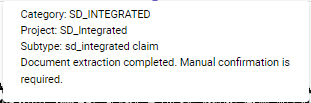
The top line displays the category || project || subtype to which the document displayed on the MI screen belongs. The bottom line displays the message.
View OCR converted image
Click the  icon to view the OCR converted image in a separate tab (see below).
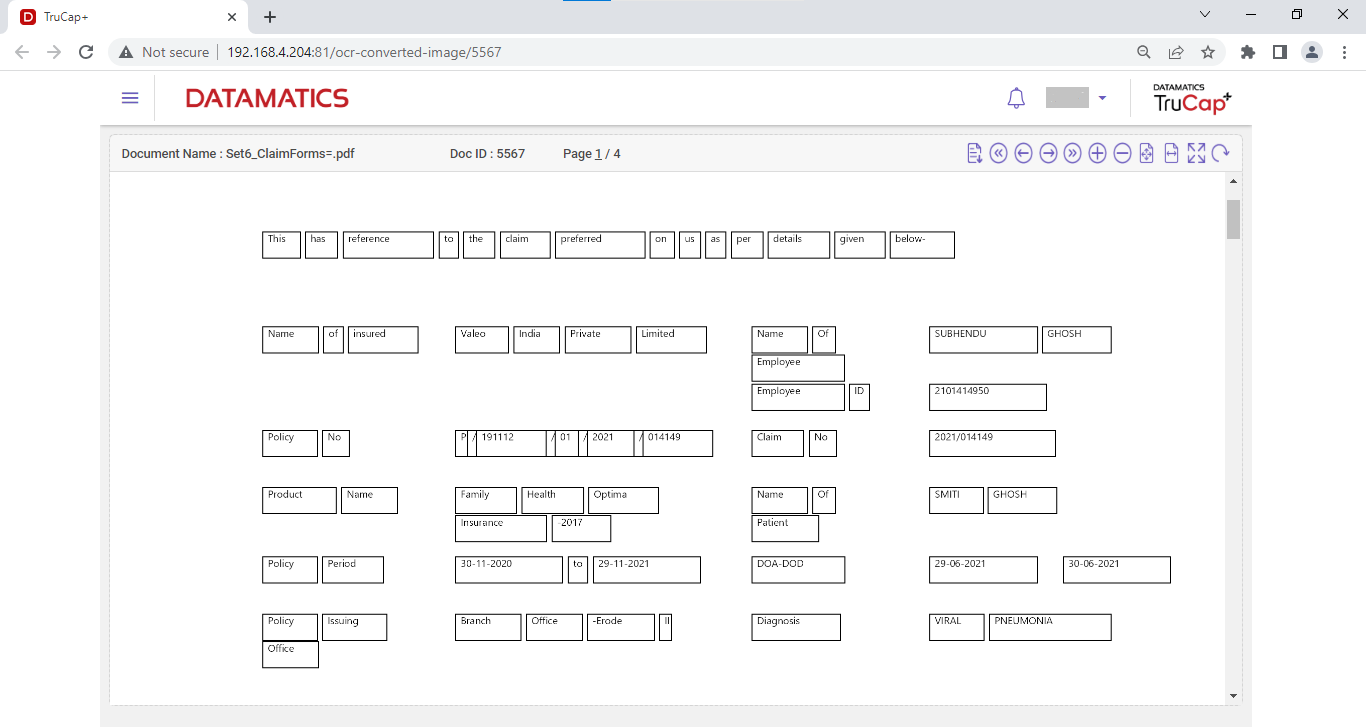
The below image explains some handy tools available on the upper-right corner of the page.

Hover-over the above image to know about the available features.
Cancel
Click the  icon to reset any changes. The Cancel changes? pop-up opens. Click OK to reset any changes done on the MI screen.
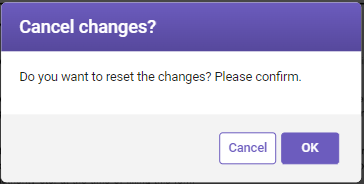
Once you click OK, the same document is displayed on the MI screen with reset changes.
Hot keys
To access hotkeys, click the  icon on upper-right corner of the Manual Process/Quality Check page. Following is the list of hotkeys:
|
HOTKEYS |
DESCRIPTION |
|---|---|
|
Alt+A |
Actual Size |
|
Alt+C |
Cancel Button |
|
Alt+I |
Zoom In document |
|
Alt+K |
Open Hot Keys pop-over |
|
Alt+M |
Send Document to Splitter |
|
Alt+O |
Zoom Out document page |
|
Alt+P |
Fit to Page |
|
Alt+PgDn Key |
Go to Last page of document |
|
Alt+PgUp Key |
Go to First page of document |
|
Alt+R |
Rotate Image |
|
Alt+S |
Save Button |
|
Alt+U |
Forward to User Button |
|
Alt+V |
Display Validation Pop-up for current field |
|
Alt+W |
Fit to Width |
|
Ctrl+Alt+H |
Go to Header Section |
|
Ctrl+Alt+F |
Go to Footer Section |
|
Ctrl+LEFT_ARROW key |
Go to Previous page of document |
|
Ctrl+RIGHT_ARROW key |
Go to Next page of document |
Page navigation

With the above section of the quick access toolbar, you can use the features available to navigate the document, or to change the size of the displayed document, or to rotate the document.
Integrated validation
When a user switches between the tabs on the integrated MI screen and if there is any inter-document validation rule applied. An Integrated Validation window opens.
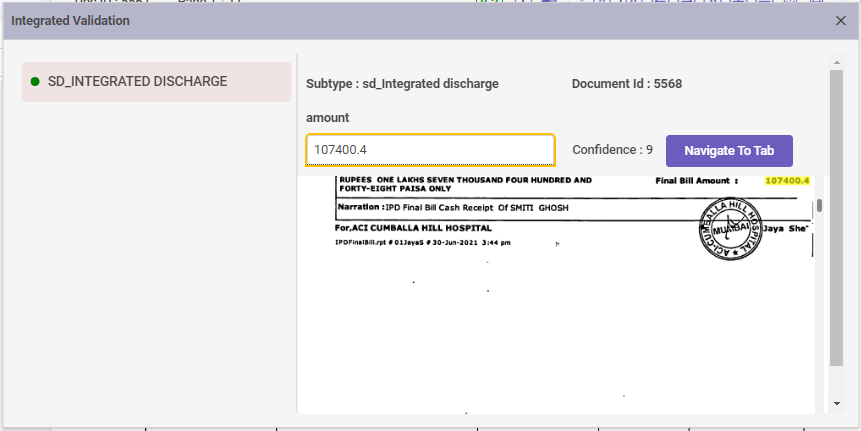
On the left side of the window, it shows the tab name. Once you click on the tab, the field details are visible on the right side of the window. Click Navigate to Tab to go to the respective field.